Respond to a revision request
When the verifier has completed a review round and identified issues requiring correction, the client's model status changes to Revision Requested. The client can review each Finding, make the necessary changes to the model, and reply to document what was done. Once all Findings have been addressed, the client can submit their revisions.
Prerequisites
- The registered model status is Revision Requested.
- The user has the Admin or Editor role.
Step 1: Open the revision request
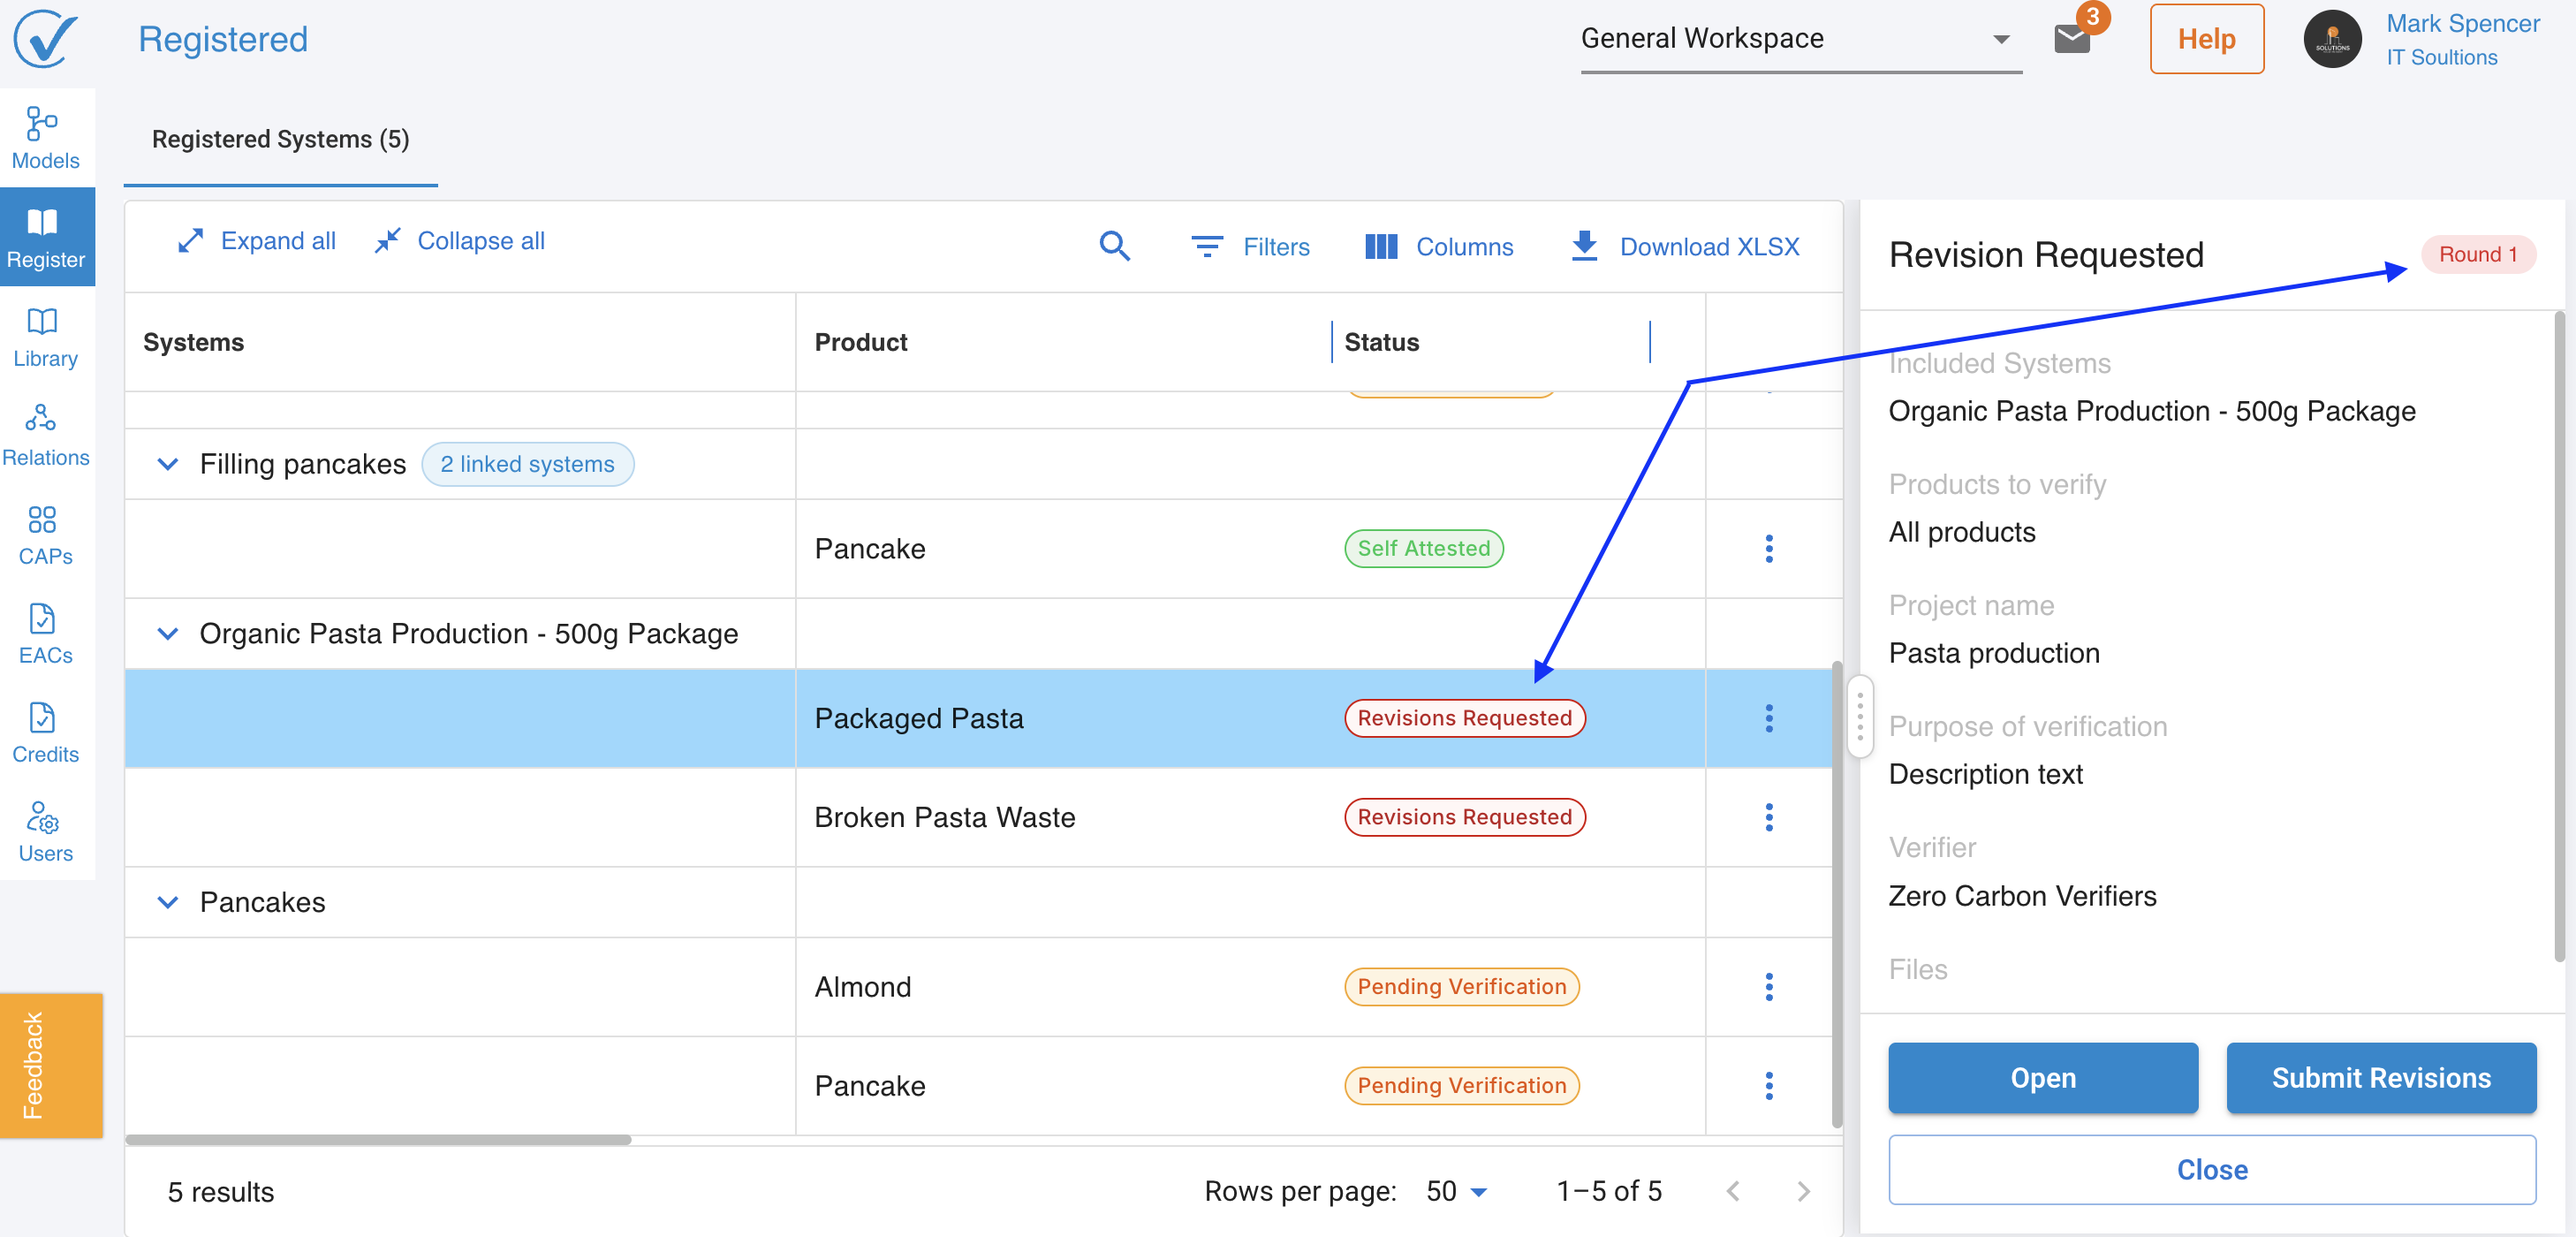
- Go to the Register page.
- Click on the model with Revision Requested status. The right sidebar updates to reflect the revision context, for example, "Revision requested — Round 1."
- The sidebar shows a progress bar indicating how many Findings have been addressed relative to the total raised by the verifier.
- Click Open.
Step 2: Review Findings and update the model
The model opens in read-editable mode. A Findings panel is visible inside the model view, listing all Findings raised by the verifier in this round.
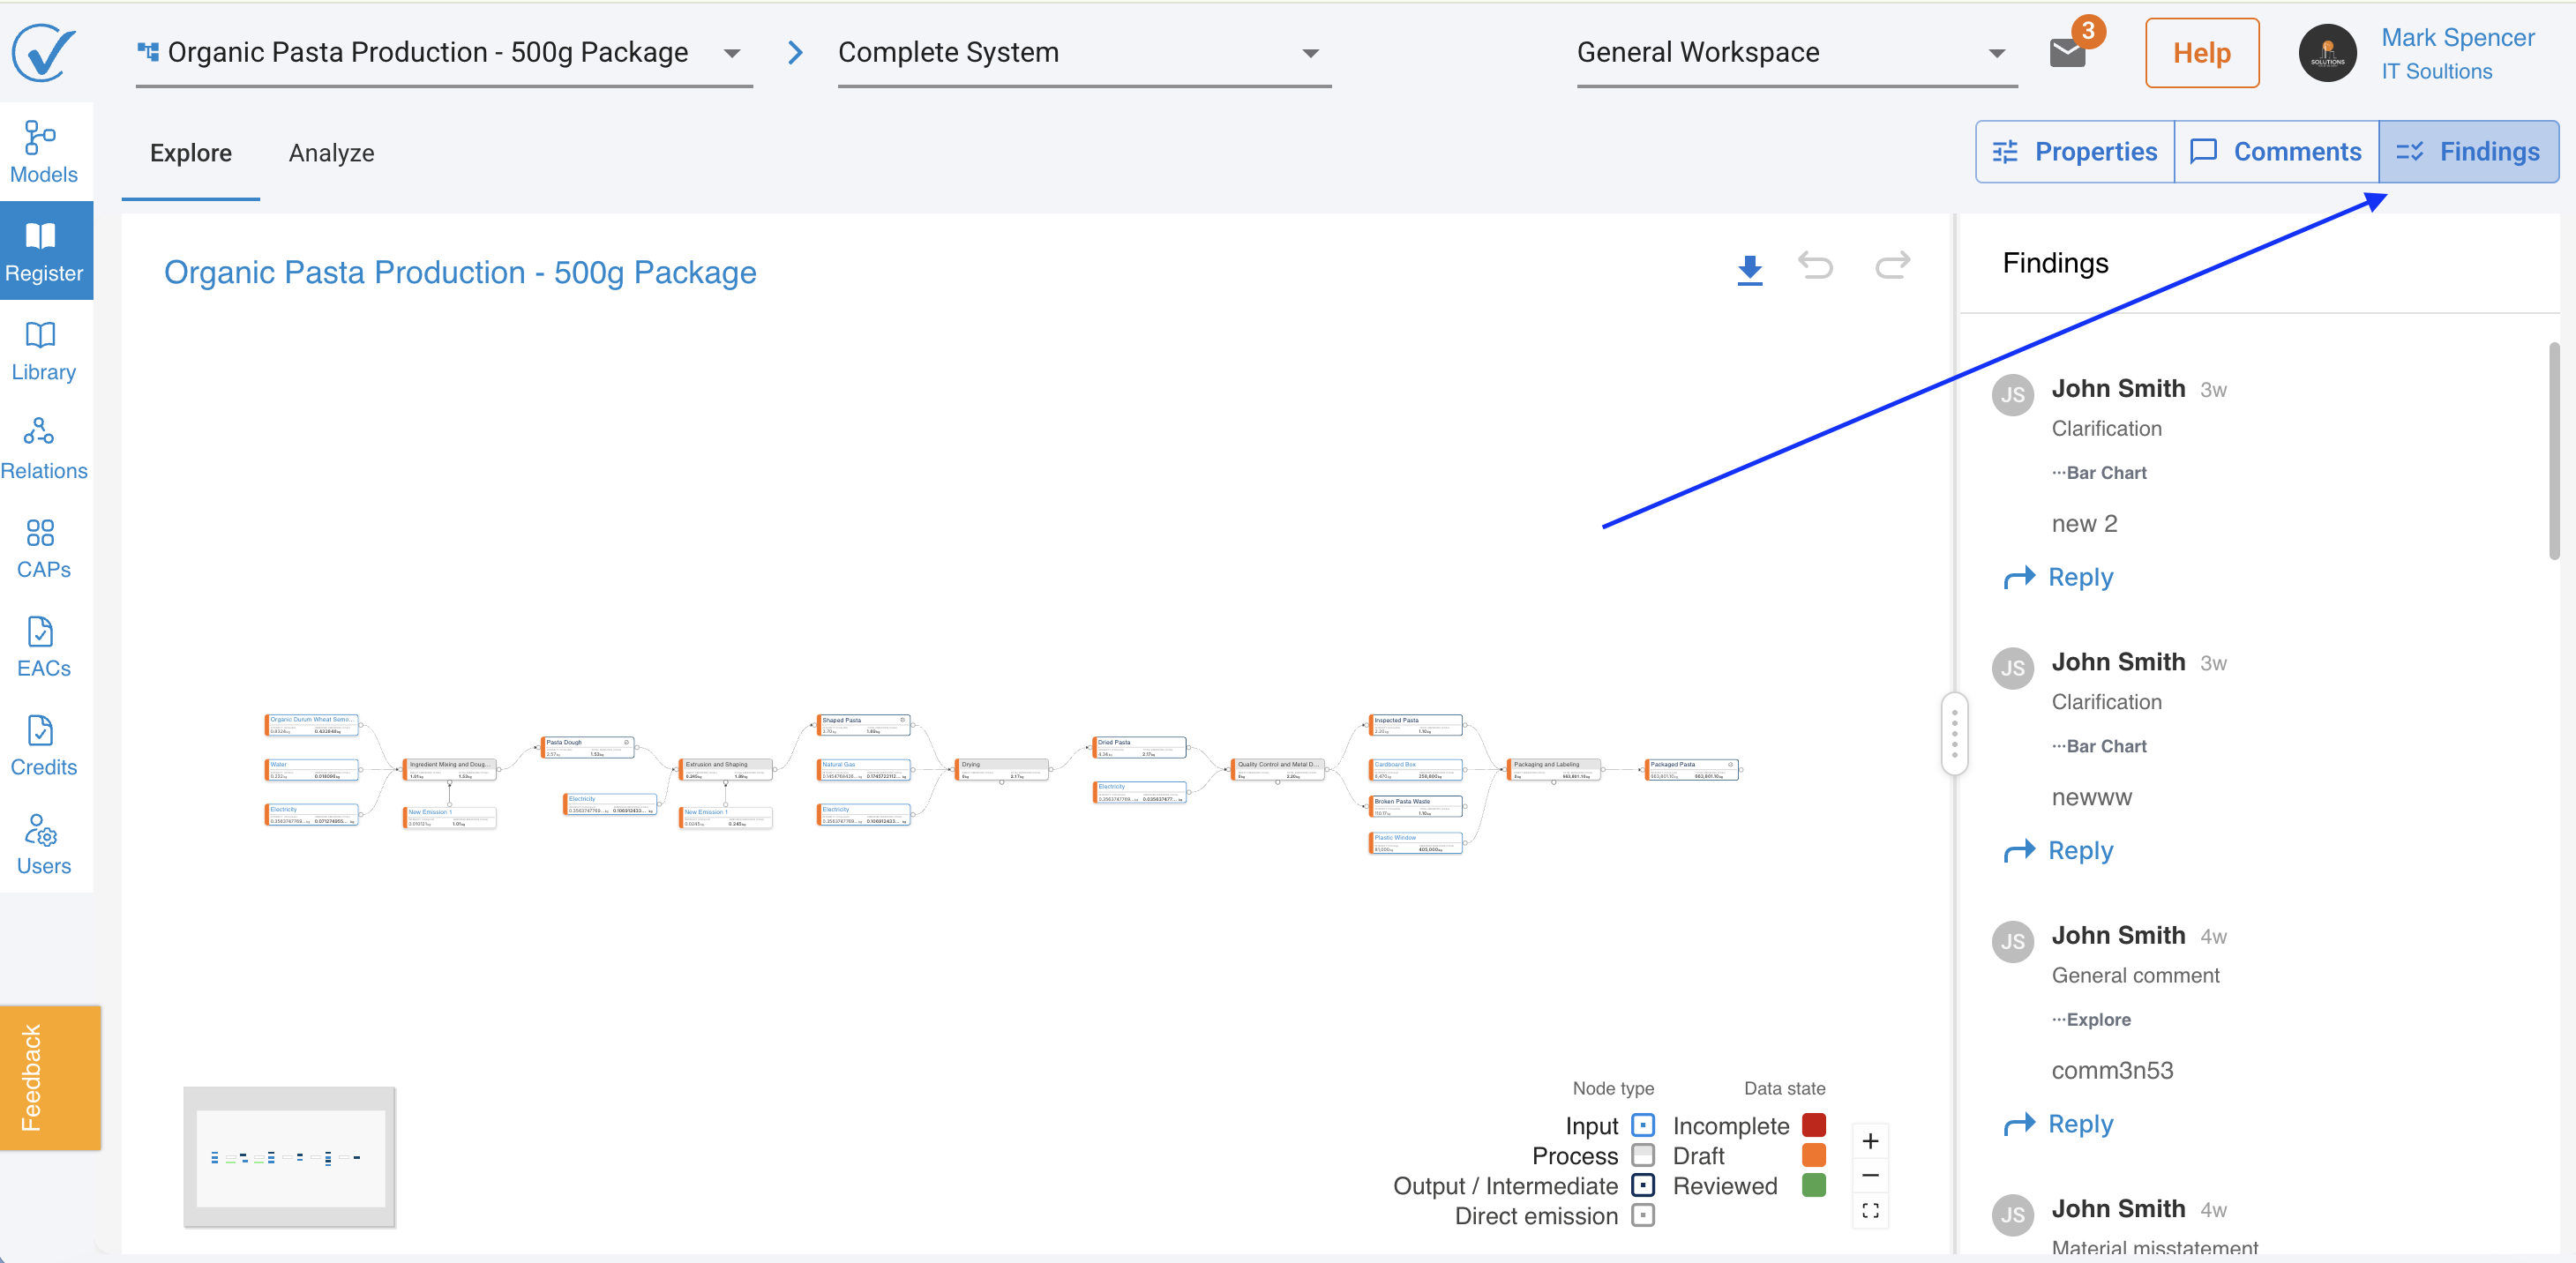
Each Finding shows:
- The verifier's comment.
- The location of the evidence context, for example, Model, Product, or Node.
- A reply thread.
For each Finding:
- Read the verifier's comment and locate the referenced area of the model.
- Make the necessary correction to the data.
- Reply to the Finding to document what change was made. The reply is the formal corrective action record for that Finding.
A few things to note:
- Data in the model can be updated while in this mode.
- New Findings cannot be added. The client can only reply to Findings raised by the verifier.
- The verifier cannot see the client's replies or add new Findings until the client submits their revisions.
Step 3: Track progress
The right sidebar can be checked at any time to review the progress bar. It updates as the client replies to Findings, showing how many remain before submission.
Related articles
Last updated: 6/17/26, 12:27 PM