
Setting up and reviewing standards
The Standards page is where verifiers define the verification standards their organization operates with. These standards are set up in the verifier account before any engagement begins. When a client accepts a verification request, the standards configured in the account appear on the acceptance page, where verifiers select which standards apply to that engagement.
Setting up standards in the verifier account
Standards are configured at the account level, not per engagement. This means the same library of standards is available across all engagements.
To add a standard:
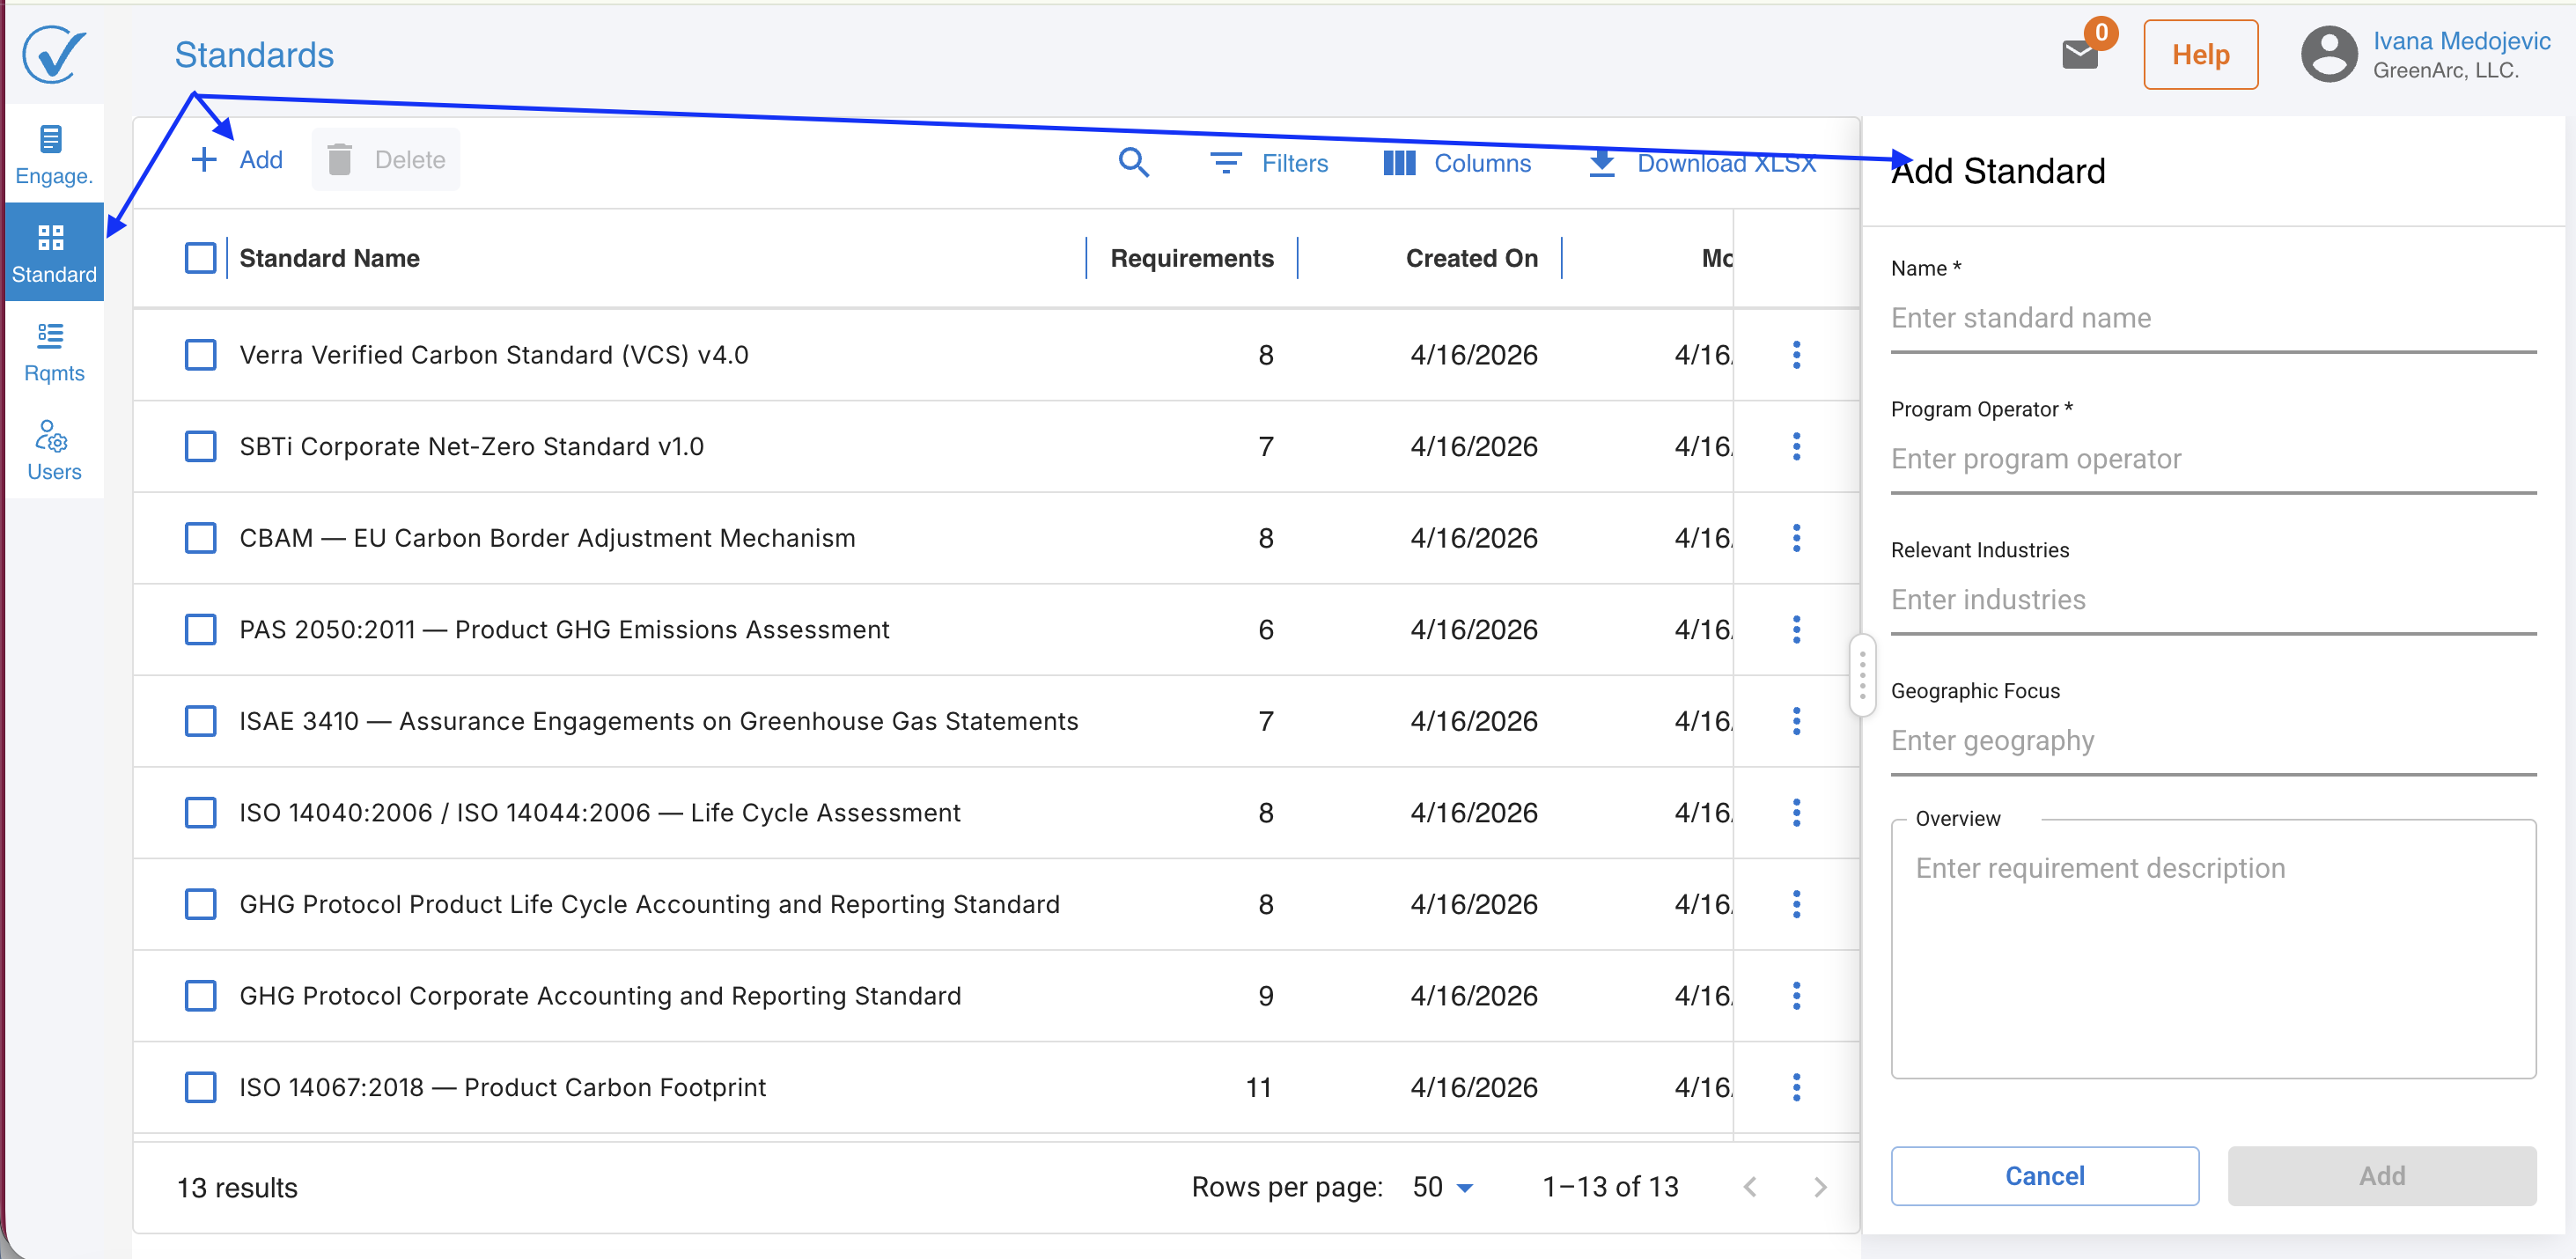
- Go to account settings and open the Standards page.
- Click Add standard.
- Enter the standard name and any relevant details, such as the applicable framework, scope, or version.
- Save the entry.
Repeat this for each standard the organization uses. The full list will be available for selection on the acceptance page whenever a new engagement is initiated.
Selecting standards during acceptance
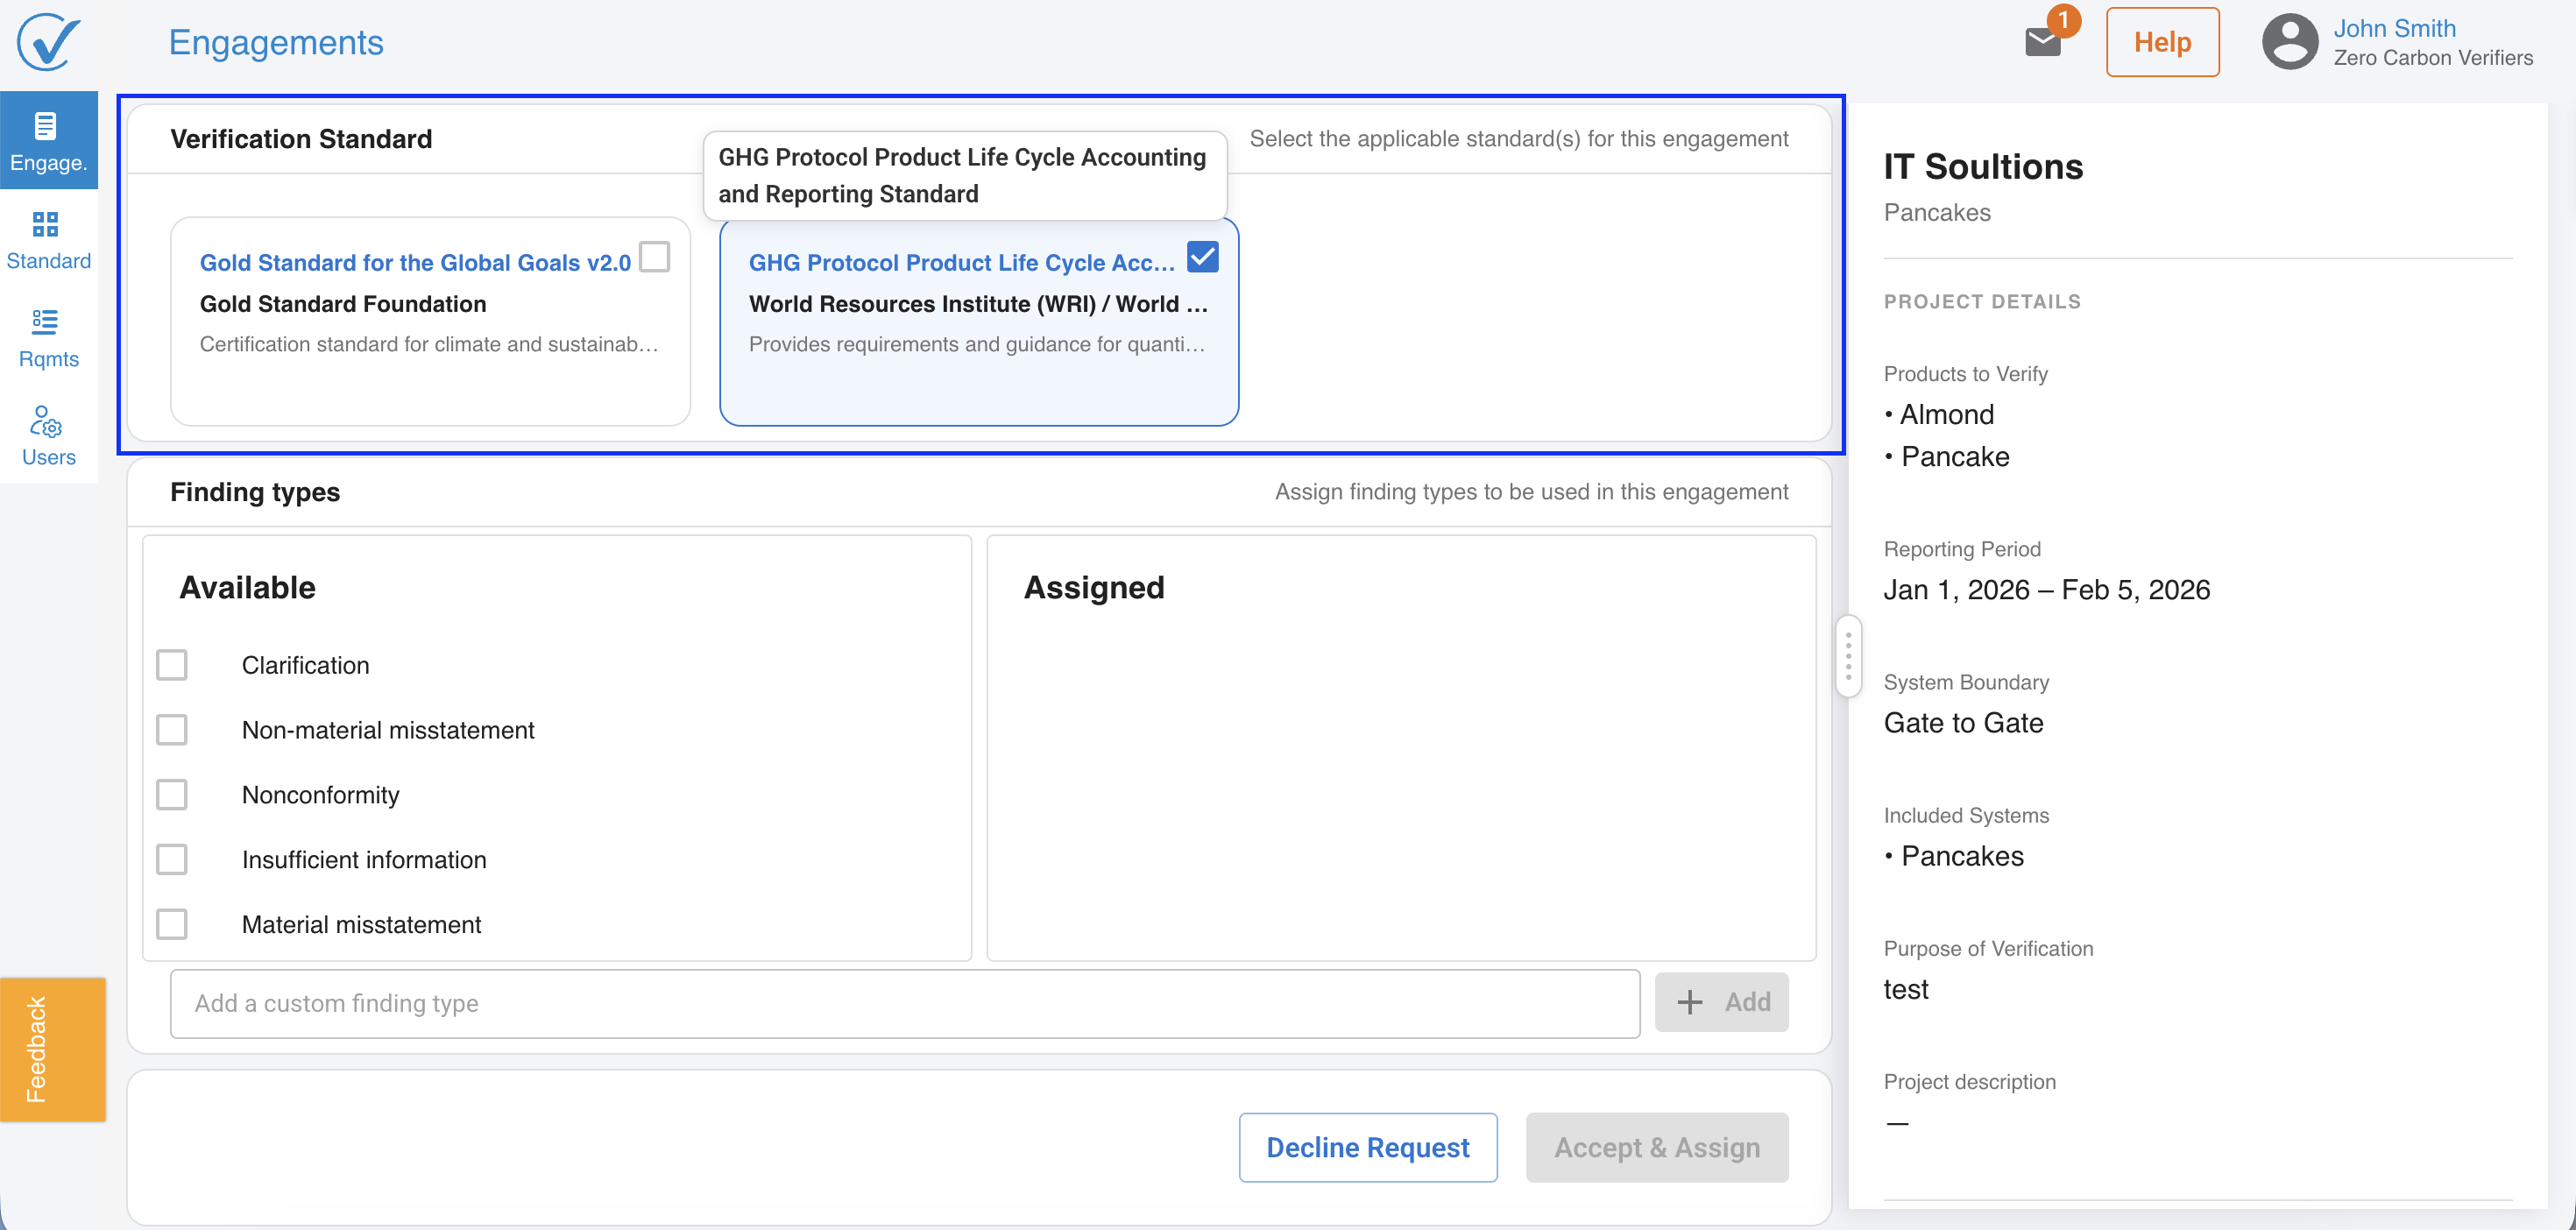
When a verifier accepts a verification request, the acceptance page displays the list of standards configured in the account. The verifier selects the standards that apply to the specific engagement.
Selecting a standard on the acceptance page also selects the controls attached to that standard by default. The selected controls will appear in the review mode during the verification process.
1. Go to the Engagements page and open an active engagement.
2. Select the Standards tab within the engagement detail view.
Related articles
-Setting up and reviewing requirements
- Issuing a verification opinion
Last updated: May 2026