
Understanding Workspaces
What is a Workspace?
Think of workspaces as separate environments within your CarbonSig account. Each workspace keeps its carbon data organized and isolated, allowing different teams or projects to work independently while remaining part of the same organization.
Real-world analogy: Workspaces are like separate offices within one building - each team has their own space with their own files, but everyone works for the same company.
Why use Workspaces?
Organize by Structure
Location-based:
- Different facilities or manufacturing sites
- Regional offices
- Geographic markets
Team-based:
- Product teams
- Business units
- Departments
Project-based:
- Individual client projects
- Specific initiatives
- Time-bound programs
Benefits
- Data separation - Keep project data organized and separate
- Access control - Assign team members only where they need access
- Clear ownership - Each team owns their workspace data
- Parallel work - Multiple teams work simultaneously without interference
- Focused view - Users only see relevant data for their work
What each Workspace contains
Every workspace maintains its own separate collection of:
Systems
- Your carbon accounting systems
- Product lifecycle assessments
- Process flowsLibraries
- My Reference Emission Data - Your custom life cycle inventory data
CAPs (Carbon Attested Products)
- Your certified carbon data products
- Published carbon footprints
- Attestation certificates
EACs (Environmental Attribute Certificates)
- Transferred CAPs
- Renewable energy certificates (→coming soon)
Carbon Credits
- Your carbon credit inventory
- Credit purchases and consumption
- Credit transactions
Relations
- Supplier relationships
- Partner connections
- Request management
Important: Data in one workspace is completely isolated from other workspaces (except for Admins who see everything).
The Workspace selector
Where to find It
The workspace selector appears in your CarbonSig header/navigation when you have access to multiple workspaces.
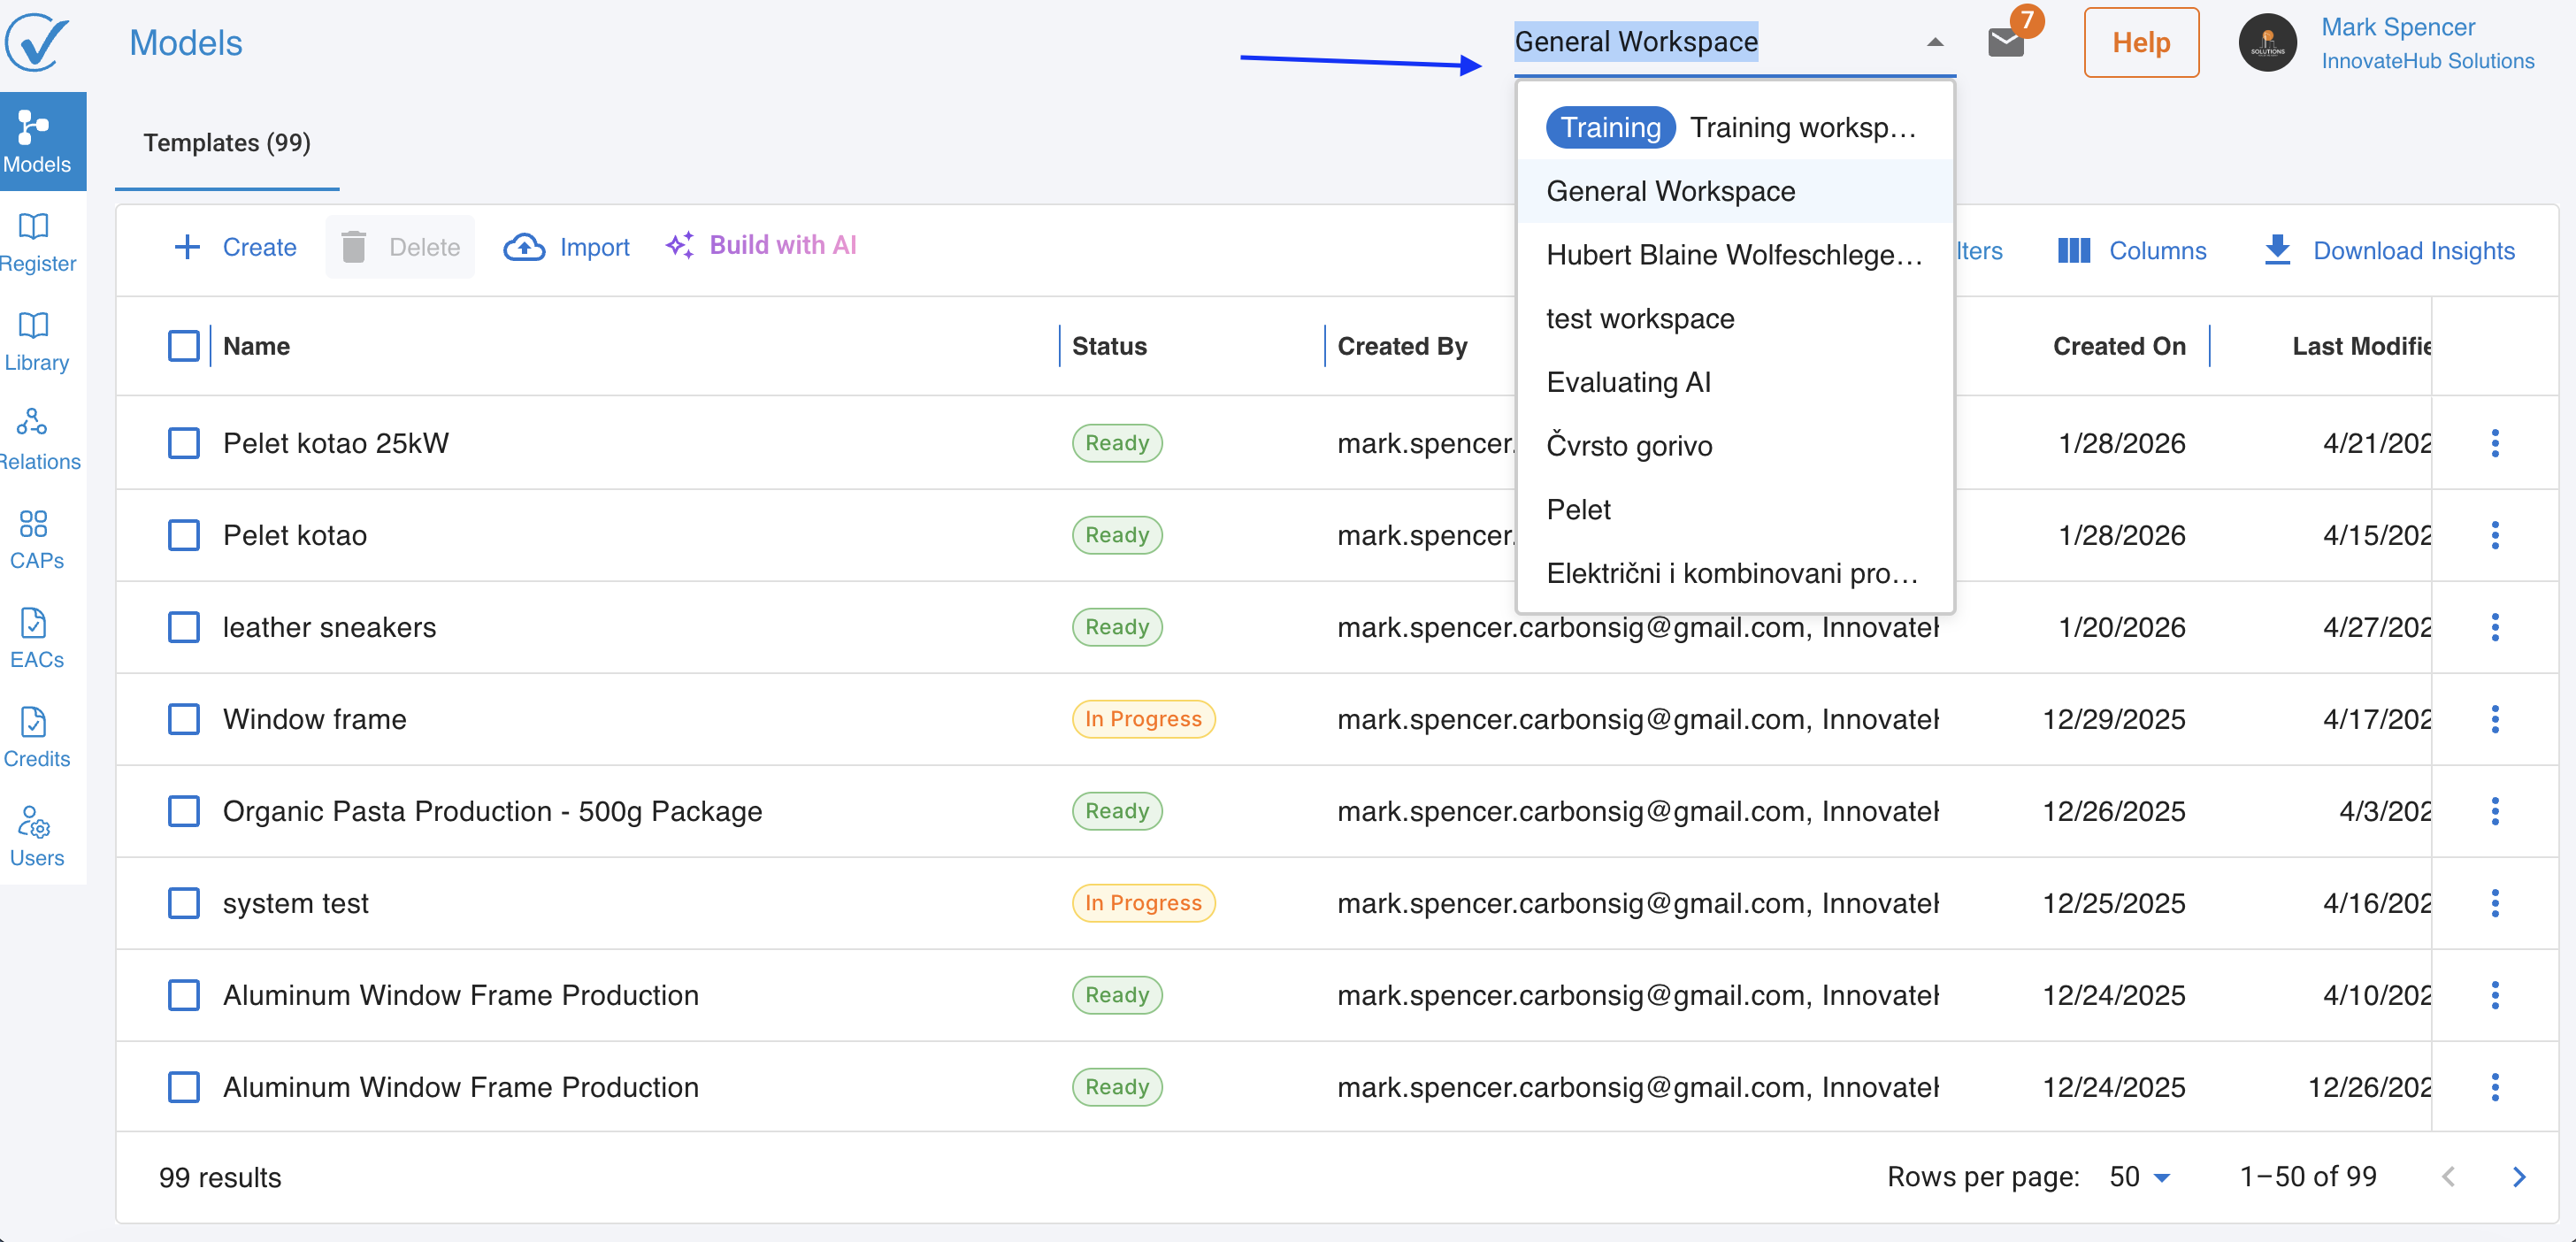
What it looks like:
- Shows your currently active workspace name
- Click to see a dropdown of all workspaces you can access
- Includes your organization(s) (→coming soon)
How to switch Workspaces
- Click on the current workspace name in the header
- Review the list of available workspaces
- Select the workspace you want to work in
- Access that workspace's data immediately
What happens: The entire interface updates to show data from the selected workspace. You're now working in that environment.
environment.
Special Workspace: Training Workspace
Your personal practice environment
Every user gets their own Training Workspace - a private space to learn and experiment.
Key features:
- Completely private - Only you can see this workspace
- For learning - Practice using CarbonSig without affecting real data
- Experiment freely - Try features without consequences
- Data stays separate - Training data won't mix with production data
- No transfers out - Can't transfer data from training to other workspaces (except exporting systems)
When you'll use it:
- Learning how to create systems
- Testing new features
- Practicing workflows
- Training new team members
Why it matters: You can make mistakes and experiment without affecting your organization's actual carbon data.
Training Workspace rules
✓ Always available to every user
✓ Private to you (not even Admins can see your training data)
✓ Excluded from dashboards and analytics
✓ Cannot transfer data to production workspaces
✓ Can export systems for use elsewhere
Pro tip: Use your Training Workspace to build and test systems before creating them in production workspaces.
Workspace access and permissions
Who sees what Workspaces?
Admin role:
- Automatically see ALL workspaces in the account
- Access to both current and future workspaces
- Can manage workspace settings
- Full visibility across the organization
Editor and Viewer roles:
- See only workspaces assigned to them by Admins
- Must be explicitly granted access to each workspace
- Access controlled on workspace-by-workspace basis
- Plus their own Training Workspace
Your default workspace
If an Admin adds you without assigning any production workspaces initially, you'll only see:
- Your Training Workspace (always available)
The Admin can add production workspace access anytime.
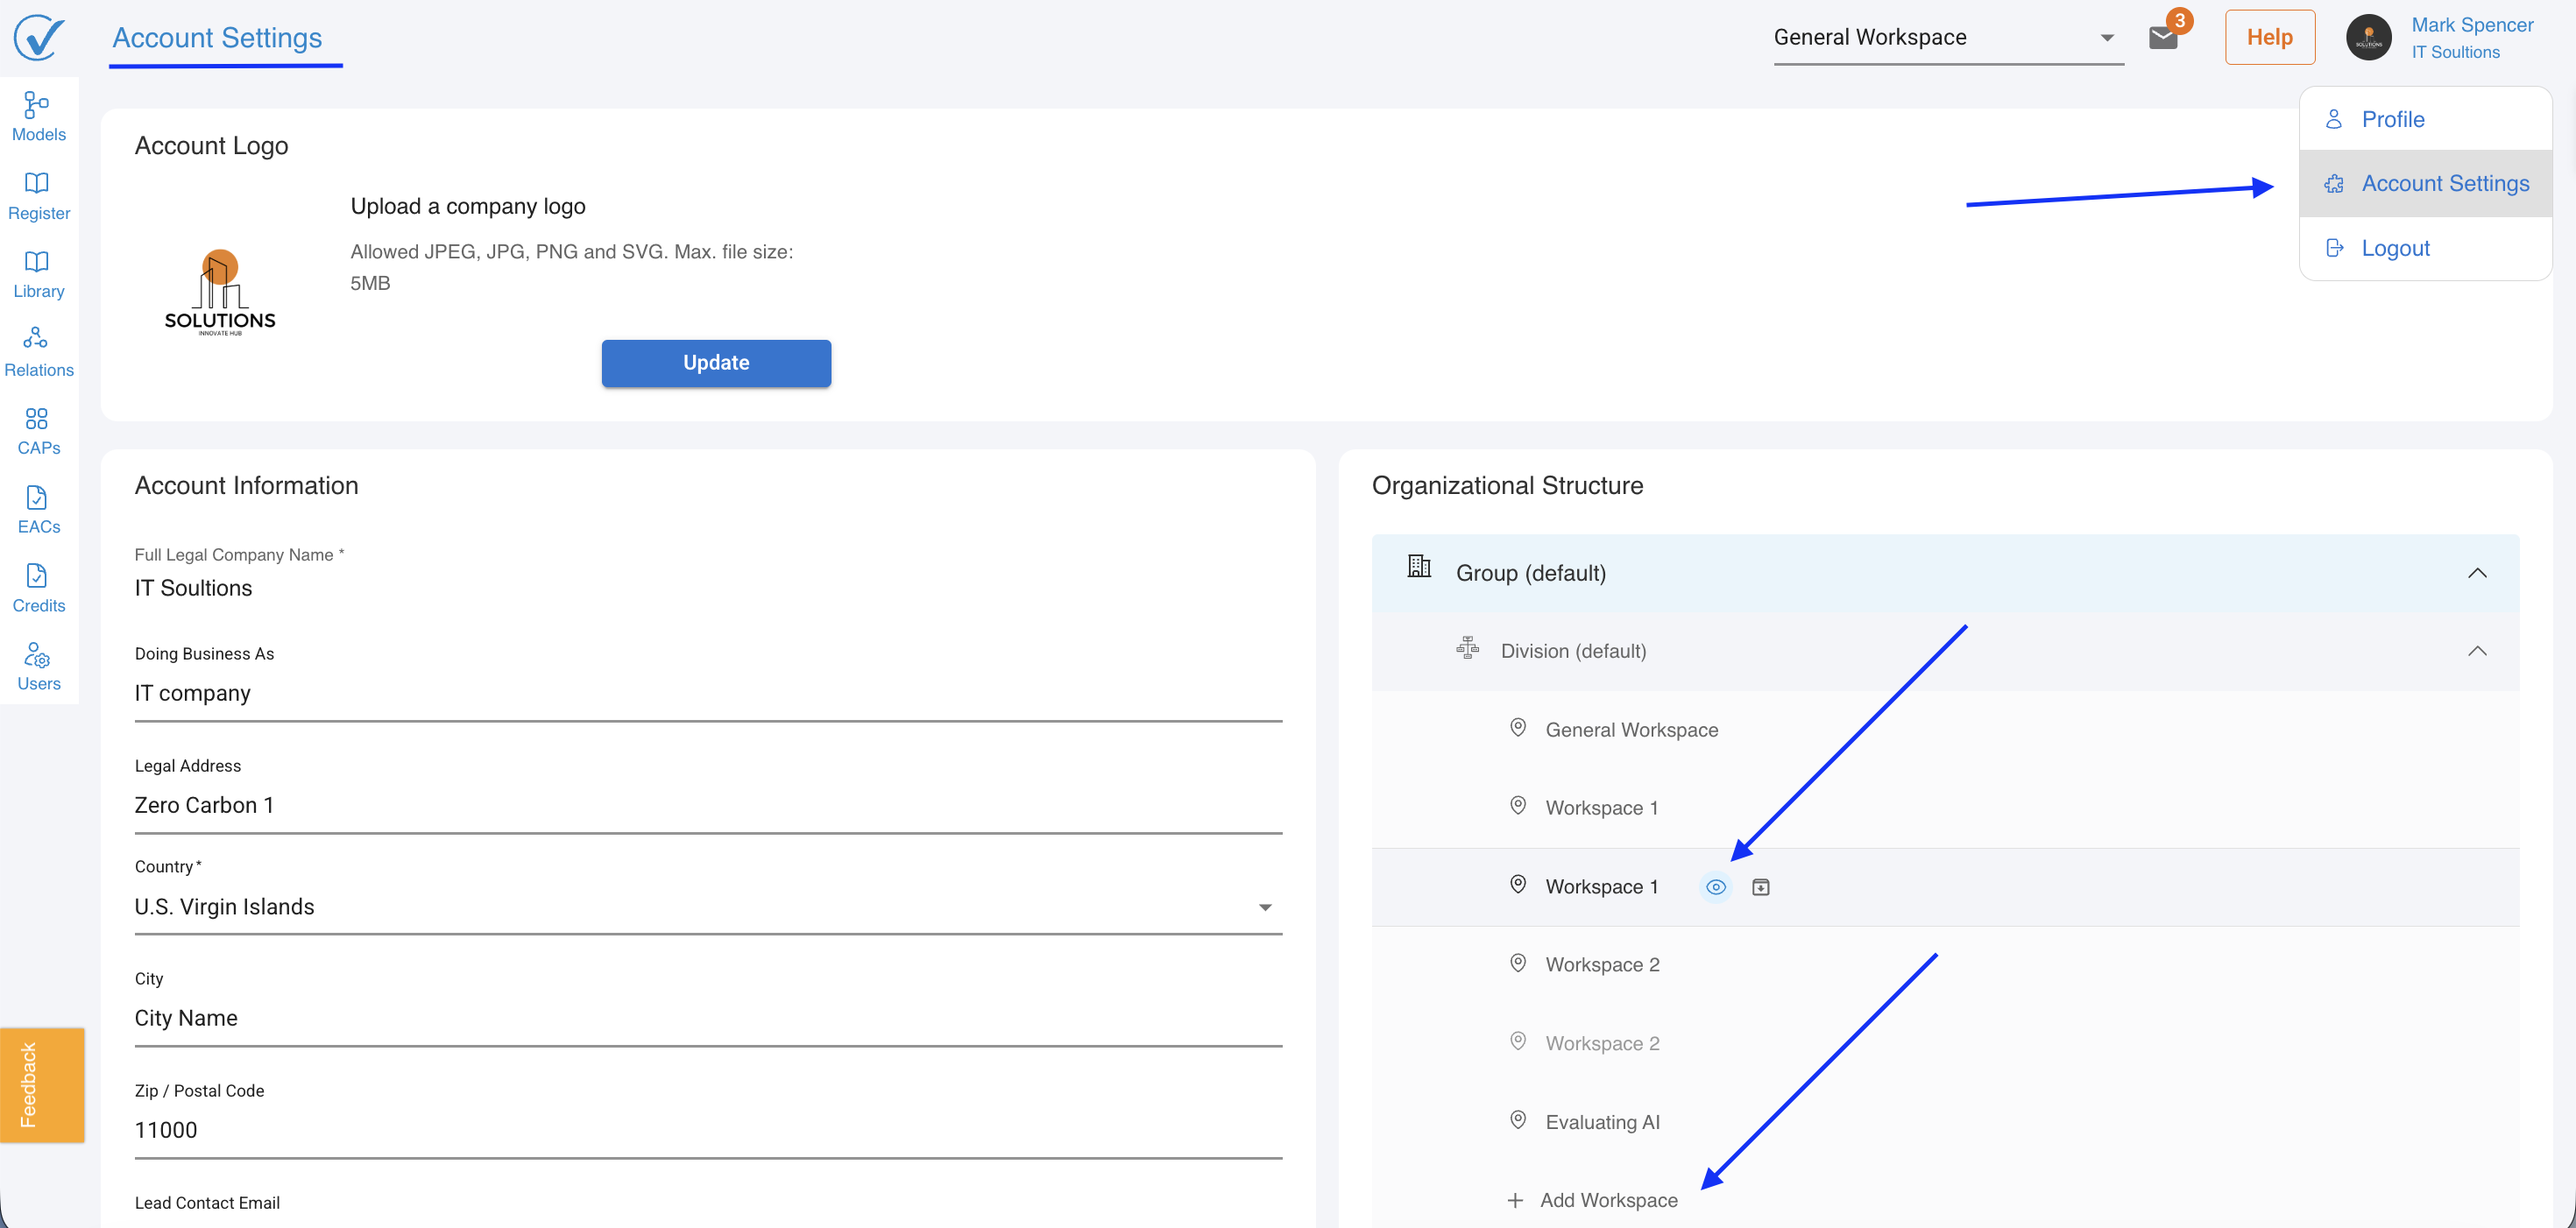
Managing Workspaces (Admins only)
Accessing Workspace settings
Only users with Admin role can create and manage workspaces.
How to access:
- Click your profile icon in the top right corner
- Select Account Settings from the dropdown menu
- In the Organizational Structure panel on the right side, locate Workspaces
- From here, you can view, create, edit, or archive workspaces
Creating a new Workspace
Steps to create:
- Navigate to Account Settings → Workspaces (in the Organizational Structure panel)
- Click the "Create Workspace" button
- Fill in the workspace details:
- Workspace Name - Use clear, descriptive names (e.g., "Chicago Manufacturing Facility")
- Description (optional) - Briefly explain the workspace's purpose
- Location/Address - Physical address or region
- Click "Save" to create your new workspace
Editing Workspace details
You can modify:
- Workspace name
- Description
You cannot modify:
- Workspace ID (system-generated, permanent)
Archiving Workspaces
What happens when you archive a workspace?
When you archive a workspace, it becomes inactive but preserves all data. This is different from deletion:
Archived workspaces:
- ✓ All data is preserved and can be restored
- ✓ Users lose access until the workspace is unarchived
- ✓ Systems, CAPs, and credits remain intact but inaccessible
- ✓ Can be unarchived at any time to restore full access
- ⚠️ External users will need to be re-added after unarchiving
Important notes about external users:
- External users who had access will lose it when workspace is archived
- They will NOT automatically regain access when you unarchive
- You'll need to manually re-invite external users
- If an external user was the only user in the workspace, you must add them again
When to archive:
Consider archiving when:
- ✓ Project is completed but you want to keep historical data
- ✓ Temporarily consolidating workspaces
- ✓ Workspace is inactive but data may be needed later
- ✓ Testing is complete but you want to preserve test scenarios
How to archive a workspace:
- Go to Account Settings → Workspaces (in the Organizational Structure panel)
- Find the workspace you want to archive
- Click the trash icon next to the workspace name
- Select "Archive Workspace"
- Review the confirmation dialog showing:
- All users who will lose access
- Systems, CAPs, and credits that will become inactive
- External users who will need to be re-added
- Click "Archive" to confirm
How to unarchive a workspace:
- Go to Account Settings → Workspaces (in the Organizational Structure panel)
- Click the trash icon
- Select "Unarchive Workspace"
- Important next step: Re-invite any external users who need access
What gets restored:
- ✓ All internal users regain access automatically
- ✓ All systems, CAPs, and credits become active again
- ✓ All historical data is preserved
- ⚠️ External users must be re-added manually
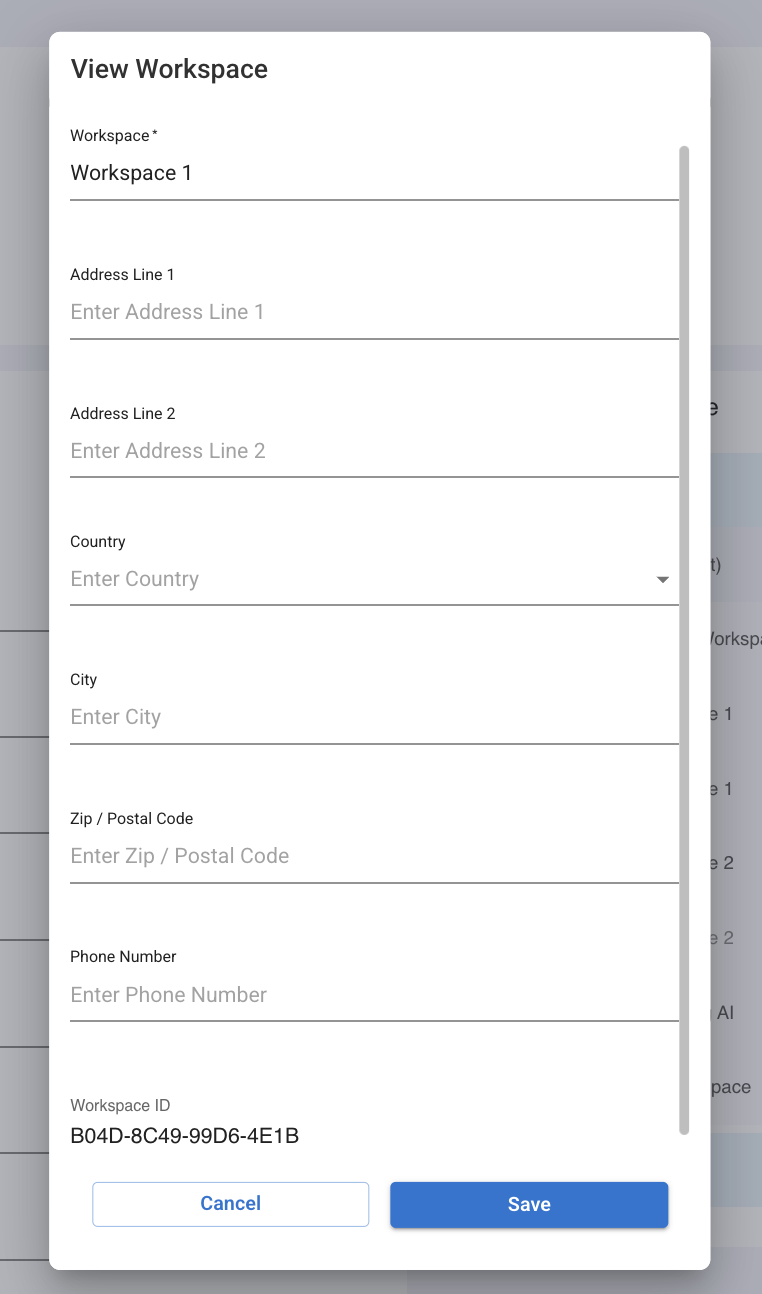
Workspace IDs and Transfers
What is a Workspace ID?
Every workspace has a unique identifier called a Workspace ID.
Format: xxxx-xxxx-xxxx-xxxx (mix of letters and numbers)
Characteristics:
- ✓ System-generated when workspace is created
- ✓ Unique across all of CarbonSig
- ✓ Permanent (never changes)
- ✓ Required for transfers between accounts
Where to find Workspace ID
Method 1: Workspace modal
- Go to Account Settings → Workspaces (in the Organizational Structure panel)
- Find the workspace, click View icon
- Find the Workspace ID in the details
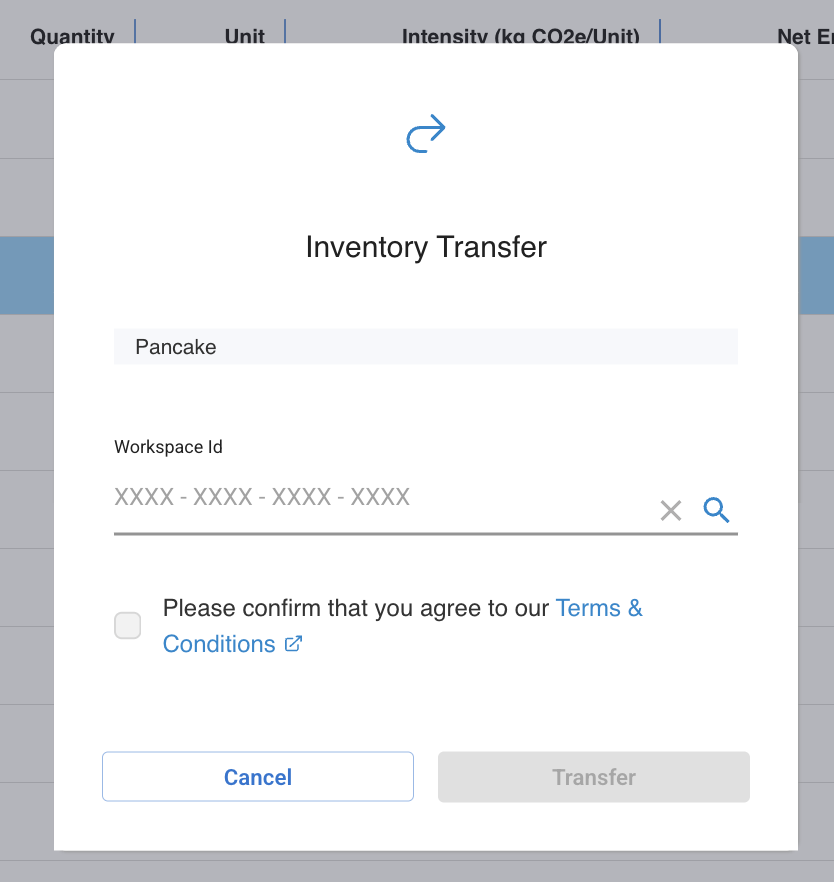
Using Workspace IDs for Transfers
Transfers between accounts:
- Enabled using Workspace IDs
- Transfer carbon data, systems, or credits between different organizations
- You'll need the recipient's Workspace ID to transfer
Transfers within same account:
- Between workspaces in your organization (→coming soon)
How to transfer:
- Initiate transfer from your workspace
- Enter recipient's Workspace ID
- Select what to transfer
- Confirm and complete transfer
Best practices
Planning your Workspace structure
Start simple:
- Begin with fewer workspaces
- Add more as needs become clear
- Don't over-complicate initially
Think long-term:
- How will your organization grow?
- Will you add more locations?
- How do teams naturally organize?
Be consistent:
- Use similar naming conventions
- Follow same organizational logic
- Document your workspace structure
Assigning Users to Workspaces
Strategic assignment:
- ✓ Give access only where needed
- ✓ Start with minimum access
- ✓ Add more workspaces as roles expand
- ✓ Review assignments regularly
Role considerations:
- Admins get all workspaces automatically
- Editors need workspaces where they create content
- Viewers need workspaces they monitor
Learn more about user management →
Naming Workspaces
Good names:
- ✓ "Chicago Manufacturing Facility"
- ✓ "EMEA Sales Division"
- ✓ "Project Sunrise - Q1 2025"
- ✓ "R&D Lab - Building 3"
Avoid:
- ✗ "WS-001" (too abstract)
- ✗ "Test" (unclear purpose)
- ✗ "John's Workspace" (tied to person)
- ✗ "EMEA-DIV-03-SALES" (too complex)
Maintaining your Workspaces
Regular reviews:
- Quarterly: Review who has access to what
- Annually: Clean up unused workspaces
- Ongoing: Update as organization changes
Housekeeping:
- Remove users who no longer need access
- Delete completed project workspaces
- Update names if purposes change
- Document workspace purposes
Before archiving:
- Notify affected users - Let team members know the workspace will be archived
- Review external user list - Document which external users had access
- Export important reports - Generate any reports you might need while archived
- Verify data completeness - Ensure all critical data has been entered
Common scenarios
Scenario 1: Multiple facilities
Your organization: Manufacturing company with 3 factories
Workspace structure:
- Workspace 1: "Detroit Factory"
- Workspace 2: "Houston Factory"
- Workspace 3: "Phoenix Factory"
- Workspace 4: "Corporate Oversight" (for executives)
User access:
- Detroit team → Detroit workspace only
- Houston team → Houston workspace only
- Regional managers → Multiple relevant workspaces
- Executives (Admin role) → All workspaces automatically
Scenario 2: Consulting firm
Your organization: Consulting firm with multiple client projects
Workspace structure:
- Workspace: "[Client A] - Supply Chain Assessment"
- Workspace: "[Client B] - Carbon Footprint 2025"
- Workspace: "[Client C] - Net Zero Strategy"
- Workspace: "Internal Research"
User access:
- Consultant A → Client A and Client B workspaces
- Consultant B → Client C workspace
- Partners (Admin role) → All client workspaces
- External auditor → Specific client workspace (as External User with Viewer role)
Scenario 3: Product teams
Your organization: Product company with multiple product lines
Workspace structure:
- Workspace: "Product Alpha"
- Workspace: "Product Beta"
- Workspace: "Product Gamma"
- Workspace: "Shared Resources"
User access:
- Alpha team → Alpha workspace + Shared Resources
- Beta team → Beta workspace + Shared Resources
- Cross-functional managers → Multiple product workspaces
- Sustainability director (Admin) → All workspaces
Troubleshooting
Can't see expected workspaces
Possible causes:
- You don't have access assigned
- You're looking in wrong account (if External User)
- Workspace was archived
- You don't have correct permissions
Solutions:
- Contact your Admin to request access
- Use workspace selector to switch accounts
- Verify workspace still exists
- Check with team about workspace changes
Workspace selector not appearing
Reason: You only have access to one workspace (plus Training)
This is normal when:
- You're new and Admin hasn't assigned multiple workspaces yet
- Your role only requires one workspace
- Organization has only one production workspace
Can't switch to workspace shown in selector
Possible causes:
- Permission issue
- Workspace suspended
- Account access revoked
Solutions:
- Refresh your browser
- Log out and back in
- Contact Admin to verify access
- Check account status
Data missing after switching workspaces
This is normal: Each workspace has separate data
Remember:
- Systems in Workspace A don't appear in Workspace B
- This is by design for data separation
- Only Admins see data across all workspaces
- Use Export and Import features to move data between workspaces (if needed)
Can't create workspace (Admin)
Possible causes:
- Account limits reached
- Permission issue
- System error
Solutions:
- Verify you have Admin role
- Send us Feedback
- Contact support
External user can't access workspace after unarchiving
This is expected behavior
External users must be manually re-added after unarchiving.
How to fix:
Option 1: If the external user appears in your User Management list
- Go to User Management
- Find the external user in the list
- Click to edit their access
- Re-assign them to the unarchived workspace
- They'll regain access immediately
Option 2: If you cannot find the external user in your list
This happens when the external user only had access to workspace(s) that are now archived.
- Go to User Management
- Click "Add User"
- Enter the external user's email address
- The system will recognize them as an existing CarbonSig user
- Assign them to the unarchived workspace
- Click "Invite External User"
- They'll receive a notification and can accept to regain access
Why this happens: When all of an external user's assigned workspaces become archived, they may no longer appear in your active user list. You'll need to re-invite them as if adding them for the first time.
Workspace still shows "archived" after unarchiving
Solutions:
- Refresh your browser (Ctrl+F5 or Cmd+Shift+R)
- Log out and back in
- Clear your browser cache
- If issue persists, contact support@carbonsig.com
Workspace vs. Organization
Understanding the Difference
Organization (Account):
- Your entire CarbonSig account
- Top-level entity
- All workspaces belong to one organization
- Users are members of the organization
Workspace:
- Sub-division within your organization
- Data container
- Multiple workspaces per organization
- Users are assigned to specific workspaces
Analogy:
- Organization = Company
- Workspace = Department or office
Related articles
To understand the complete picture:
- Add User from User Management - How to assign users to workspaces
- Understanding User Management - Roles and permissions
- External User Onboarding - External collaborators and workspace access
- Company Onboarding Guide - Setting up organizational structure
Need Help?
Questions about workspaces:
- Visit our Help Center
- Email support@carbonsig.com
- Contact your organization's Admin
Organize your carbon data effectively with workspaces! 📁
Last updated: April 2026