
User Management
Welcome to the User Management section of our help documentation. This guide will walk you through the fundamental concepts of how users, roles, and workspaces interact to create a flexible yet secure access control system.
The Foundation: Email Addresses and Accounts
At its core, our user management system follows a simple principle: each email address corresponds to exactly one user identity. This user can then have different relationships with various accounts in the system, creating a flexible network of access and permissions.
Understanding User Types: Your Relationship with Accounts
Think of user types as defining your relationship with a particular account, much like how you might be an employee at one company and a consultant at another. Our system recognizes two fundamental user types that describe these relationships.
Users: Internal Team Members
When someone is designated as a "User" in an account, they are considered an internal team member of that organization. This is their primary professional home within the CarbonSig system. Each person can be a User in only one account at a time, establishing their main organizational affiliation.
However, this same person might simultaneously serve as an External User for other accounts, allowing them to collaborate across organizational boundaries while maintaining their primary affiliation.
One critical safety feature protects your system from being left without leadership: every account must maintain at least one Admin at all times. If you're the only Admin in the system, you'll find that the option to remove yourself is disabled. This prevents accidental lockouts and ensures continuous system management. Learn more how to add users.
External Users: Cross-Organization Collaborators
External Users represent individuals who need access to your account but whose primary affiliation lies elsewhere. These might be consultants working with multiple clients, partners collaborating on joint projects, or vendors providing specialized services.
The power of the External User designation lies in its flexibility. One person can be an External User for multiple accounts simultaneously, reflecting the reality of modern professional relationships where individuals often work across organizational boundaries.
Here's where it gets interesting: whether you're a User or an External User in a particular account, you can be assigned the Admin role for that account. An External User with Admin role has the same comprehensive powers as an internal User with Admin role, demonstrating the system's flexibility in accommodating various organizational structures. Learn more how to add External user.
The Workspace Concept: Dividing Your Digital Environment
Before we dive into roles and permissions, it's crucial to understand workspaces, as they fundamentally shape how access control works in our system. Think of workspaces as separate rooms within your account's house. Each workspace contains its own set of resources and data, allowing teams to work independently while still being part of the same organization.
Workspaces create boundaries within your account, separating different areas of work. Each workspace maintains its own:
- Systems list
- CAPs (Carbon Attested products)
- Local LCI library
- EACs (Environmental Attribute Certificates)
This separation allows different teams or projects to work without interfering with each other, while still maintaining organizational oversight through the Admin role. Learn more about workspaces here.
Understanding Roles: Your Permissions Within Accounts
Now that we understand user types and workspaces, let's explore how roles determine what you can do within an account. Roles are collections of permissions that define your capabilities in the system. Unlike user types, which define your relationship with an account, roles define your authority and responsibilities within that account.
The Admin Role: Master Key to All Workspaces
The Admin role stands apart from all others in its scope and power. When someone receives the Admin role, whether they're a User or an External User, they gain complete access to every workspace within that account. This comprehensive access transcends workspace boundaries, allowing Admins to see and manage the entire organizational landscape.
Users with the Admin role see a special "Users" tab in their left sidebar for user management. This section serves as their command center, and importantly, it looks and functions identically for all Admin users regardless of whether they're internal Users or External Users. From here, Admins can add new users, remove existing ones, suspend accounts, and most crucially, assign or modify roles for any user in any workspace.
The system enforces one inviolable rule: each account must maintain at least one user with Admin role at all times. If you're the last remaining Admin, the system prevents you from removing your own Admin role or deleting your account, ensuring continuous management capability.

Functional Roles and Workspace Access
Unlike the Admin role, these roles work within the workspace structure. Users and External Users with these roles must be specifically granted access to individual workspaces where they need to work.
The Editor role can view and modify content within assigned workspaces. Has full editing permissions for Systems, Libraries, EACs, Relationship Management, and Carbon Credits pages in their designated workspaces. Workspace access is controlled by Admin.
The Viewer role has read-only access to assigned workspaces. Can view all content but cannot make any modifications or changes. Workspace access is controlled by Admin. Perfect for stakeholders who need visibility without modification capabilities.
How Roles and Workspaces Interact
Here's where the system's design becomes particularly elegant. When a User or External User has a non-Admin role, they can be assigned access to one workspace, several workspaces, or potentially all workspaces - but this access must be explicitly granted for each workspace. This granular control allows organizations to precisely manage who can see and modify what.
In contrast, the Admin role bypasses this workspace-by-workspace assignment. The moment someone receives the Admin role, they automatically gain access to all current workspaces and any future workspaces created in the account. This design ensures that Admins can always fulfill their oversight responsibilities without administrative overhead.
The Special Behavior of Viewer Access
The Viewer role deserves special attention due to its unique characteristics. When you assign the Viewer role to someone, the system automatically disables all other roles for that person. Conversely, enabling any functional role automatically removes Viewer access. This mutual exclusivity prevents confusion about what actions a user can perform.
Users with Viewer access can explore their assigned workspaces like visitors in a museum - they can look at everything but cannot touch or modify anything. They cannot add, remove, edit, delete, transfer, or perform any actions that would change data. Within their accessible workspaces, they can browse CAPs, view process templates, examine library items, and read reports, gaining valuable insights without the risk of accidental modifications.
Workspaces Metric
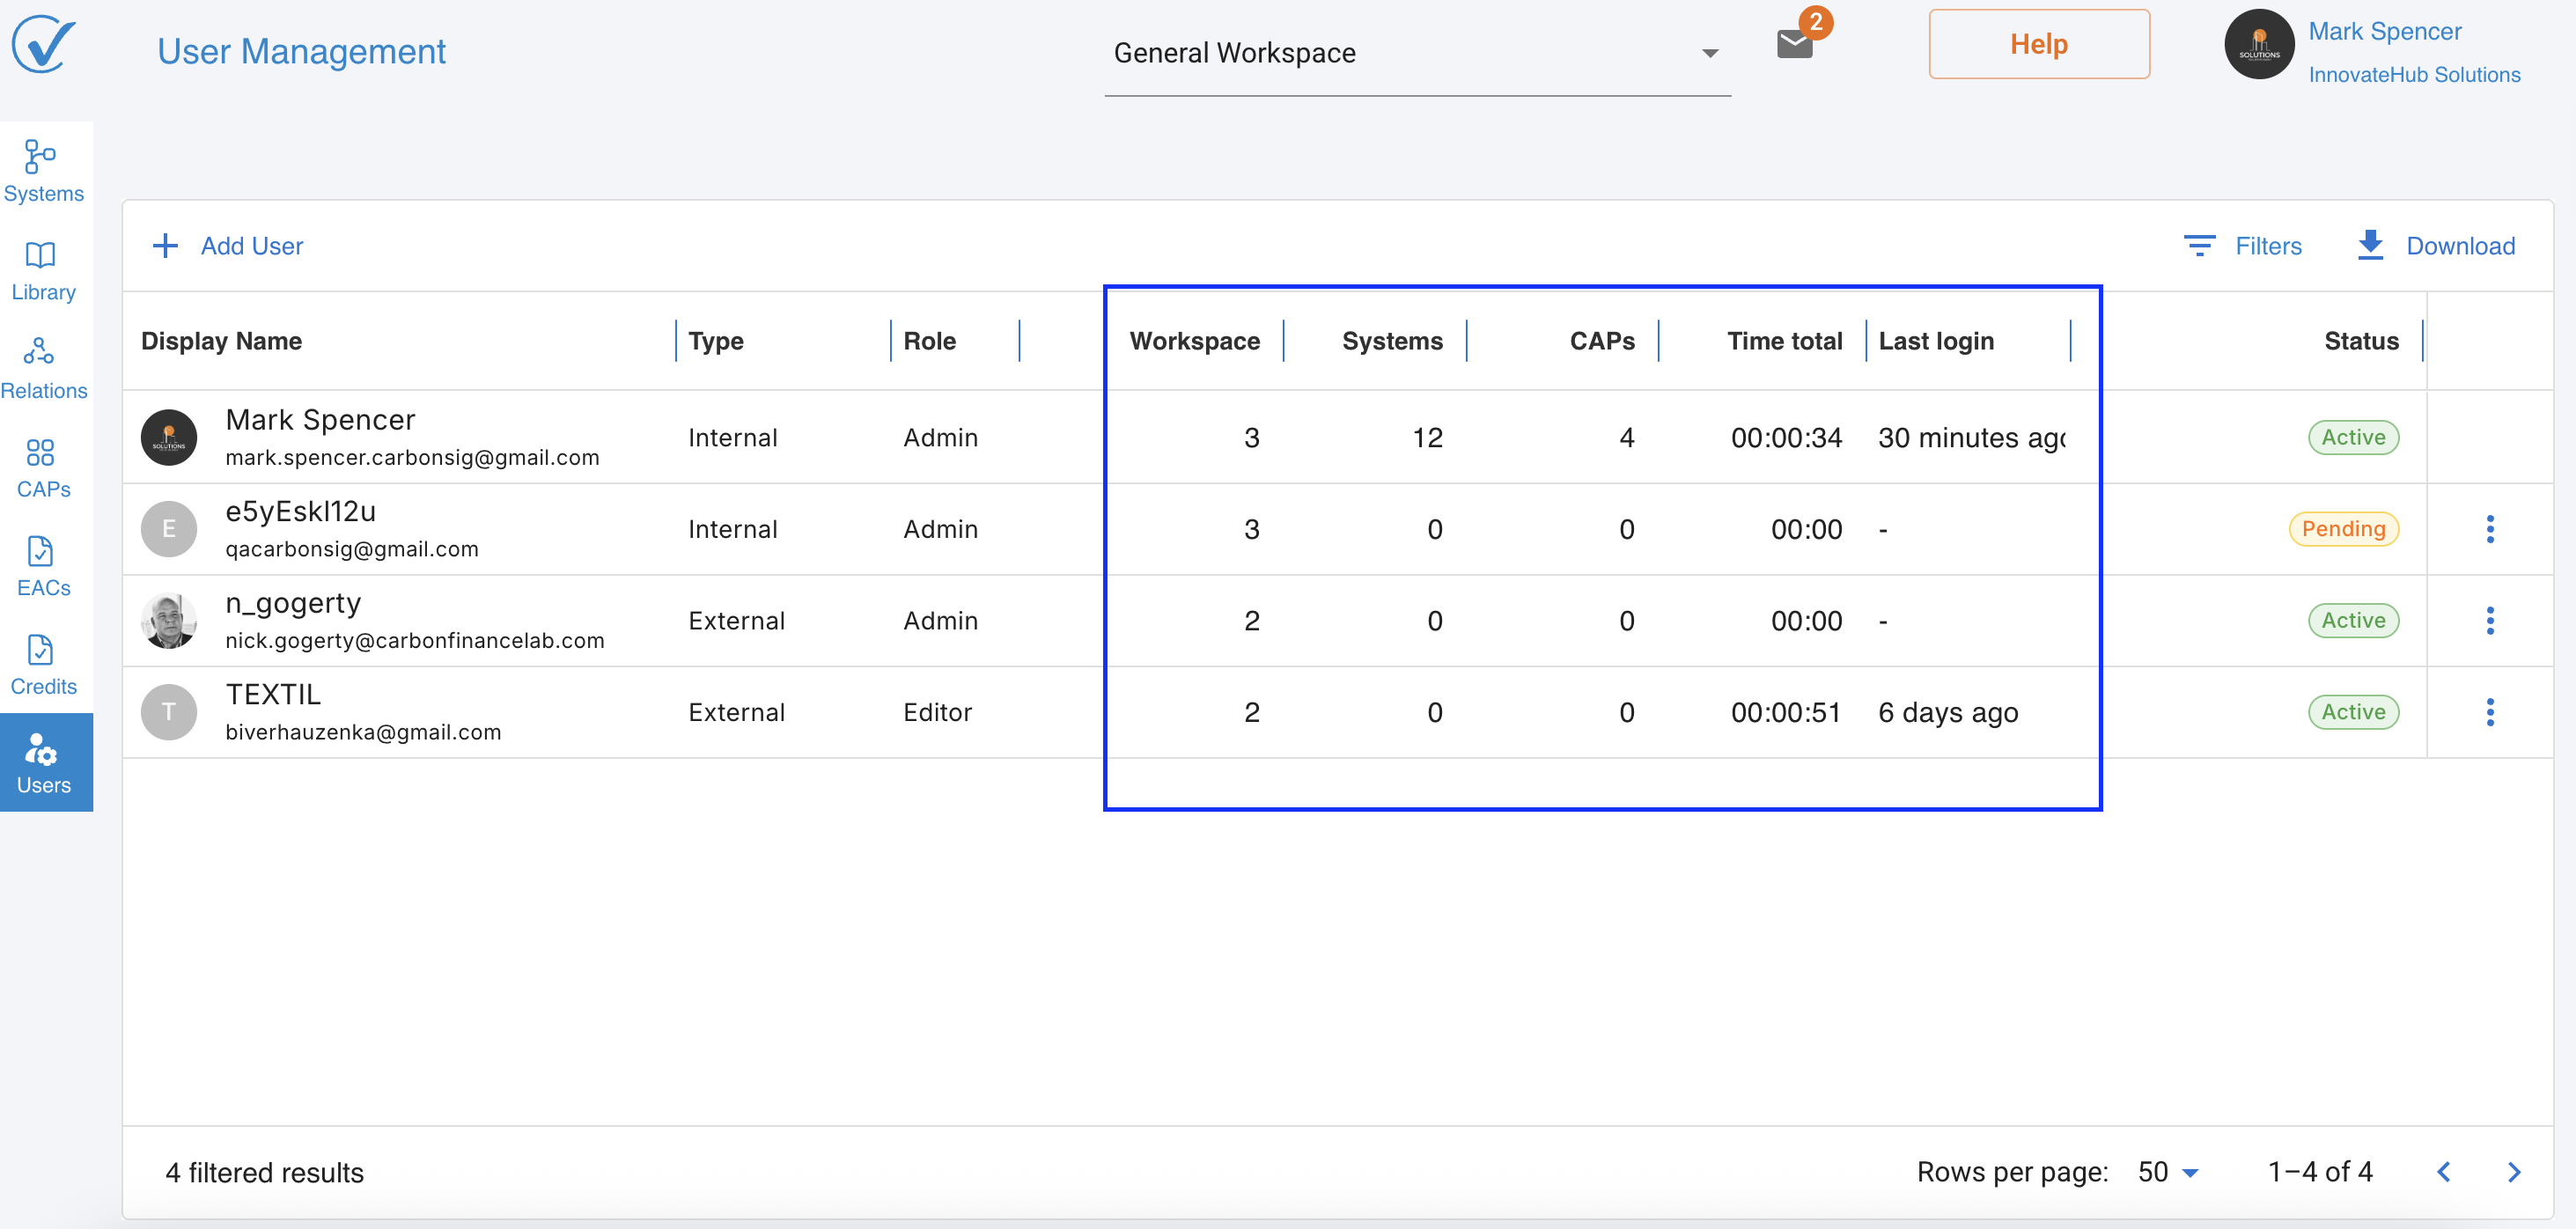
User Management page provides comprehensive metrics to help administrators understand how their team uses CarbonSig:
- View the total number of workspaces each user can access
- Includes both owned and shared workspaces
- Excludes training workspaces from the count
System Templates Created
- Track the number of system templates created by each user
- Dynamic counting that updates when systems are copied
- Helps identify power users and content creators
Published CAPs
- Monitor the total number of Carbon Assessment Plans (CAPs) published by each user
- Only counts successfully published CAPs
- Provides insights into user productivity and engagement
User Activity Time
- Provide valuable insights into platform usage patterns
Practical User Management
As someone with the Admin role, you'll manage users through the User Management section accessible via your left sidebar "Users". This interface remains consistent for all Admins, providing a unified experience regardless of your user type.
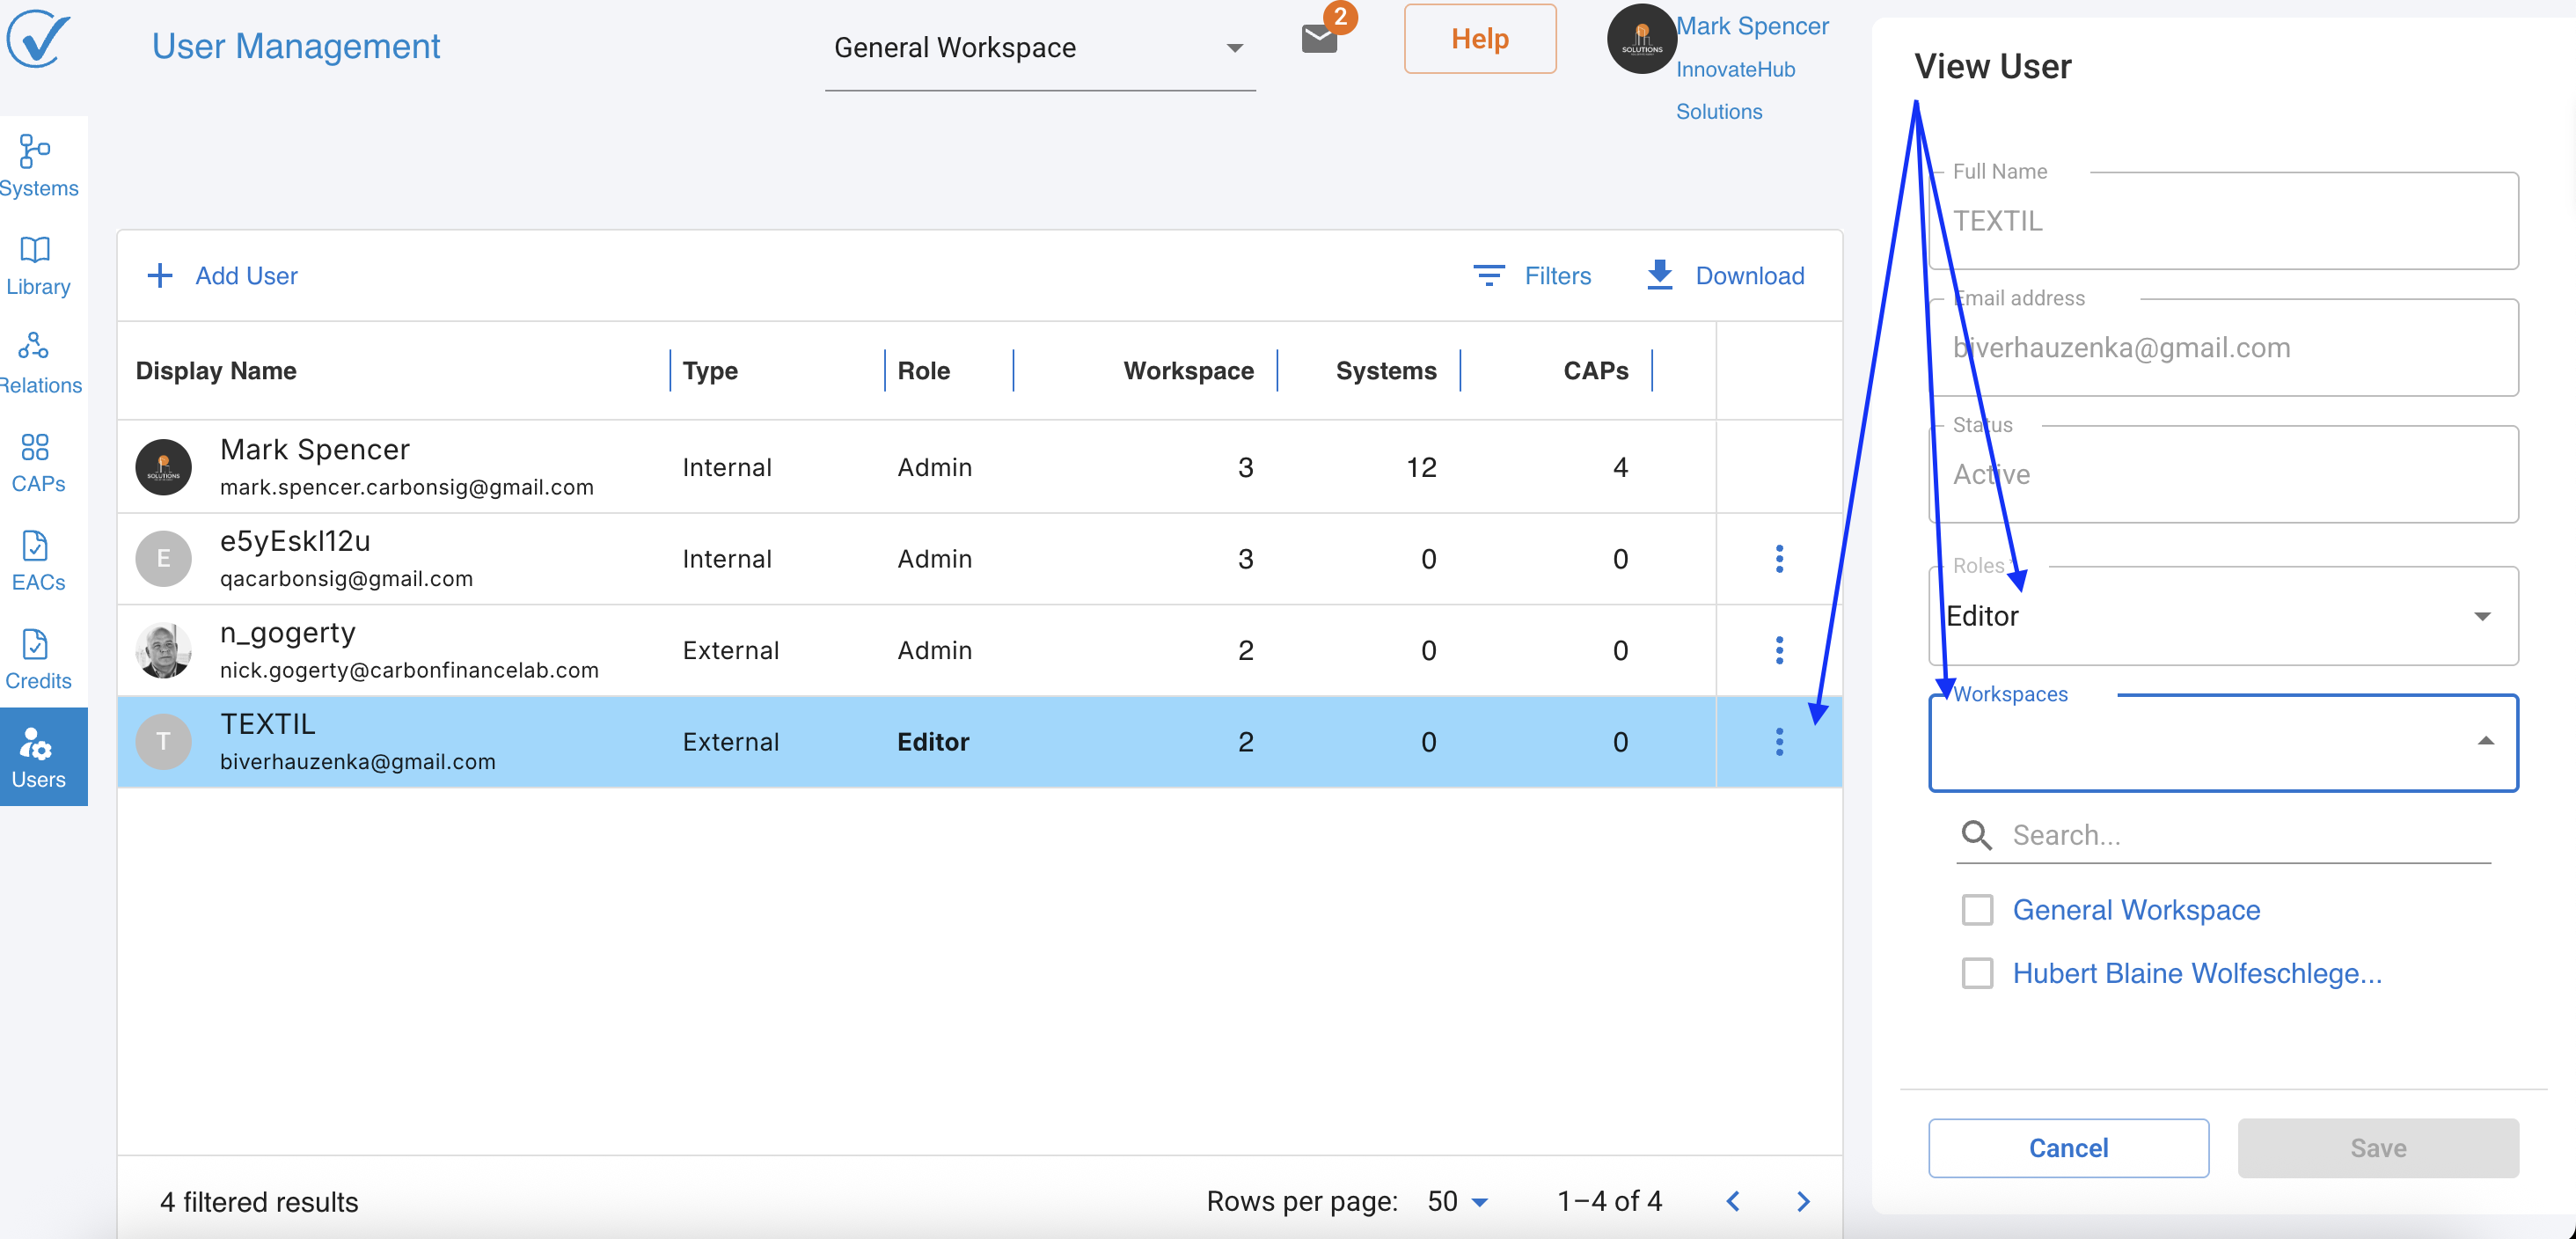
When setting up a new team member, first determine their user type. Will they be an internal User (this is their primary professional home) or an External User (they're primarily affiliated with another organization)? Next, consider their role requirements. Do they need Admin access to manage users and see all workspaces, or do they need specific functional roles with access to particular workspaces?
For non-Admin roles, you'll need to make workspace assignments. Consider which areas of your organization this person needs to access. Perhaps a Editor needs access to Workspaces A and B where operations occur, but not Workspace C which handles a different project. This granular control ensures people have exactly the access they need - no more, no less.
Key Principles to Remember
The distinction between user types and roles creates a flexible system. Your user type (User or External User) defines your relationship with the account, while your roles define what you can do within that account. The Admin role transcends workspace boundaries, while other roles operate within assigned workspace limits.
External Users aren't second-class citizens in the system. An External User with Admin role has identical capabilities to an internal User with Admin role. This design acknowledges that expertise and authority don't always align with traditional employment boundaries.
Workspaces provide powerful organizational tools, but they're transparent to Admin users. This ensures that while teams can work independently within their workspaces, organizational leadership maintains full visibility and control.
Regular review of user access remains crucial. As projects evolve and team members' responsibilities change, their workspace access and roles should evolve accordingly. The system's flexibility makes these adjustments straightforward, but they require active management to maintain security and efficiency.
Moving Forward
Understanding these interconnected concepts - user types, roles, and workspaces - empowers you to create an access structure that matches your organization's needs. Start with clear workspace divisions, assign user types based on organizational relationships, and apply roles that match job responsibilities. With these tools, you can create a secure, efficient environment where everyone has exactly the access they need to be productive.
Getting Help
If you encounter any issues with user management or need clarification on specific permissions, don't hesitate to reach out to your system administrator or our support team support@carbonsig.com. Proper user management is crucial for both security and productivity, and we're here to help you get it right.
Last updated: October 2025